Showing posts with label Nails. Show all posts

Wednesday, January 21, 2015

Chevron Nails Tutorial


Here is an easy trick to get chevron nails with supplies you may already have in your craft drawer.  I love using things I have around the house off other purposes.  These zig zag craft scissors are a perfect way to make a chevron nail template.

To make this nail pattern all you are going to need is zigzag or pinking shears.  In case you aren't familiar with the term pinking shears are scissors that you use to cut fabric in a zig zag manner so it doesn't fray.  


Cut tape with sissors to make zig zag shape.  I used painters tape, but you can use scotch tape too.

Paint your nails with the under coat and let completely dry.  Place your chevron pattern stickers on nails.

Here is a handy trick that I learned when painting my walls with stripes.  Before you paint on your color, paint on a thin layer of clear or the same color as your base coat.  This will prevent the color from seeping though the tape.  Then paint your color pattern on.


I added some glitter to the chevron polish, but you can just leave it as is.

Wednesday, December 4, 2013

How to Water Marble Nails and Christmas Ornaments


I had so much fun water marbling Christmas ornaments last year, I decided to do it again this year.  This time around I made a heart pattern and used a variety of colors.  I love this craft because it uses everything I already have at home, and its cheap, if I mess up I can simply use nail polish remover and remove the pattern.

Video tutorial found here.
I used Orly French White, OPI Party in My Cabana, Wet n Wild I Need a Refresh Mint, and  Sally Hansen Lovely Lilac.

You can use a clear ornament or an opaque one.  I like the clear ones because you can see the design through different angles.

I water marbled my mails also.  You can also see that tutorial in the videos below.  


Video tutorial for water marbled ornament heart here.

Please check out my other tutorials for fun Christmas ideas:
Salt Dough Gift Tags
Book Page Star Ornament

Kleenex Box Ornament


Sunday, September 29, 2013

How to Save a Chipped Manicure (A Nail Art Tape Strip Tutorial)

I love the clean polished look of painted nails, but it totally bugs me when my polish starts to chip.  I also love the look of nail art, but I really do not have time to wait for my polish to completely dry to do any nail art.  Here is a perfect solution for my nail dilemmas. Below is a manicure that I had for a few days.  You can see that the corners are chipping but my cuticle area is fine.

To fix only the tips and to put a little nail art I decided to paint my nails white on a diagonal.
I used painters tape, but you could also use scotch tape.  Just be sure to seal the edges onto your nail so polish doesn't seep.


You could leave your manicure like this without the striping tape, but I think its cuter with the tape.

To make the manicure even cuter, I bought these nail striping tape from amazon.  It was only a dollar for 8 rolls.  Yes, it was shipped from China, but came in about a week.  The quality was decent.  One of the rolls didn't stick very well, but overall I was happy with the quality.  I don't even know how they made any money since it was only a dollar, and shipping had to be pretty expensive.  Apply the tape on each finger (see video tutorial below on tips on how to apply nail art strip tape).  You will need small cuticle scissors to cut the excess.

Couldn't be easier.  And its so much better than doing a whole new manicure.

This video tutorial is not only how to put striping tape on, but how to do it with your non dominate hand.  I am a righty and not very coordinated, so doing anything with my left hand is always a challenge.  This video will help you do nail art with your other hand.

Thursday, August 29, 2013

What Type of Water Do You Use To Water Marble Nails?

I get this question a lot on my youtube video.   Everyone seems to have different opinions, on which water is best and the right temperature.  For this experiment I used three different types of water: bottled, tap, and filtered tap.  The filtered tap was run through a Brita Filter.  I live in Southern California so I think my tap water is fairly hard (judging from the hard water stains on our shower).

I documented my experiment on the youtube video below.  I didn't try different water temperatures, but from my experience room temperature (~76 degrees Fahrenheit)  water always works best.


Here is my youtube video with the results of my experiment: 

Water marbling is tons of fun and you get a unique look to your nails.  If you want a step by step how to please watch this video: http://www.youtube.com/watch?v=-YoxnPMbVhA  There are detailed instructions there.  

For those of you who are too lazy to watch the which type of water experiment here are the results:
the type of water does not seem to make a difference.  So have fun water marbling, and don't waste good bottled water!

Tuesday, February 5, 2013

Does Adding Cornstarch to Nail Polish Make it Matte?

I've tried using Pam to dry my nails (which does not work, you can see my post here). So when I saw this pin all over Pinterest, I decided to put it to the test.  Add cornstarch to clear nail polish to make a matte polish.  Use it as a top coat for any nail polish.    I've seen lots of cool pictures where people do a french manicure using half glossy and half matte.  I always wanted to try it but never got around to buying matte polish.  This was the perfect opportunity to see if this Pinterest recipe actually works.

I say recipe loosely because if you see the link there isn't any measurements on how much cornstarch to nail polish.  For my experiment I started off with 1/4 teaspoons of cornstarch to one bottle of clear nail polish.  To put the cornstarch into the bottle I made a little paper funnel.  I found that 1/4 teaspoons was too little and ended up using approximately one teaspoon of nail polish.  One additional thing to note is that if your bottle of polish is full you need to pour out some polish to get one teaspoon of cornstarch in there.  You want to also do this on a protected surface because it gets a little messy.  I also used a small chopstick to push the cornstarch into the polish.

The entire process was pretty messy (but easy to clean up, because its only cornstarch, as long as you didn't spill the polish).  So to results of my new matte clear coat?   Marginal Pass.

Cornstarch added to clear nail polish does make it more matte.  But not a matte that is true to color.  The matte is more of a cloudy matte.  It does have a unique look to it, but not anything that I would waste a bottle of good clear coat polish on.

I have read on other forums that you can add cornstarch directly to colored nail polish to make it matte.  This may work out better, but after this test I'm hesitant to try.  Other forums said that a lot of brands now make matte top coats that are really great.   So for the effort I would say, don't try this at home.  It is not worth it.

Have you tired this before with better results?  I would love to hear your experiences.


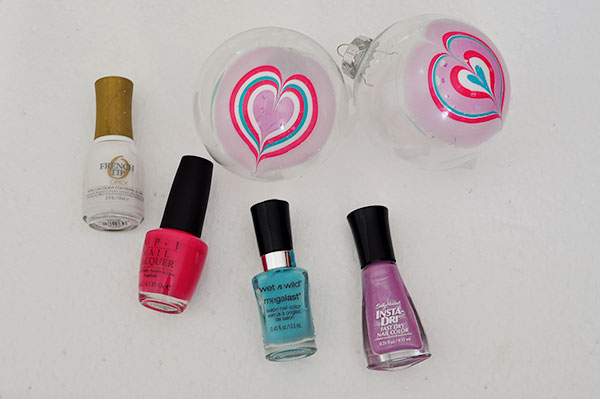
I used a cheap top coat nail NYC nail polish.
Make a funnel from any paper and do this on protected surface.
The cornstarch does get everywhere and can overflow your bottle if you have too much polish.  So remember to dump out some polish if your bottle is too full.


Looks pretty cool as it goes in the bottle.  Reminds me of the Brain Hemorrhage cocktail.

Shake up the nail polish really good.

Here is the matte polish painted on my middle finger and pinky finger.  You can see it does make it matte, but a little cloudy.

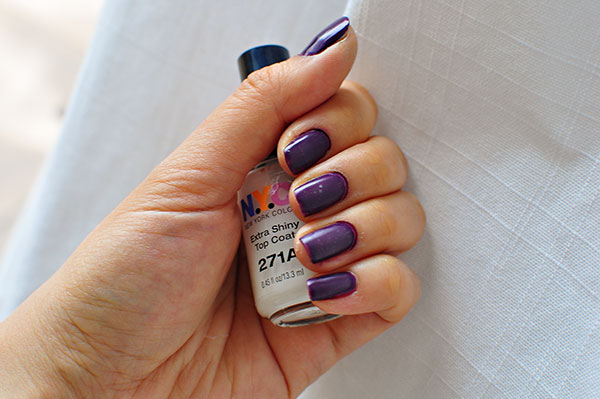
I changed my nail polish 3 times to test different colors as a base.  This one had some bubbles from where the corn starch didn't completely mix.  You can see the cloudiness better here.


With a light base you can't really see the matte.


Wednesday, January 23, 2013

How to French Manicure Nails the Salon Way

I've been falling behind on posts since my maternity leave ended.  This is a quick tutorial I created a while back on how to french manicure nails the salon way.  It's a video tutorial so I hope it will be easier to follow. They key to french manicuring is pure acetone nail polish remover, good white polish and a rounded brush.  I used a concealer brush that I purchased at Rite Aid for less than 3 dollars.  The brush is really bad for concealer, but works wonderfully for french manicuring nails.

I love doing my nails like this for weddings and work.  I rarely go get manicures now because doing it myself is so much easier and cheaper. It's even easier to do on your toes because you don't have to worry about working on your dominant hand.  One thing I forgot to mention on the tutorial is that you could also add a base coat after you clean off the white tips (right before you put your top coat).  This will help the top coat from staying on better.

I use Orly French White for the white, and Seche Vite for the top coat.


Friday, December 28, 2012

Nail Art with Salon Express Nail Stamping

I've seen the Salon Express nail stamping kit on tv and have always wondered if they work.  Amazon was selling them for only 7 dollars so I decided to give it a try.  They did not come with nail polish so I used nail art polish that I bought from the Japanese dollar store.  From the reviews online people say the Konad nail polish is the best, but it cost just as much as the stamping kit so I decided to just go with the cheapie polish.  Overall I was impressed by the stamping.  I did buy other plates off ebay, that were only a couple of bucks.  My daughter loves Hello Kitty so I bought that one for her.  The patterns are pretty cool and it works well.  Nail stamping is also strangely addicting.  I normally don't paint my nails that often but found myself painting them every week just to try new patterns.

The round nail plates are from salon express, the octagon plates are from ebay.  They were shipped from China and took about 2 weeks to arrive.

Dollar store winwax nail polish.  I opened the cap for a couple of days and dried it out a bit to get it to stamp better.

Apply polish to plate

Use a credit card to swipe off.  The kit comes with a metal scraper, but I found that the credit card works better.

After you swipe off the polish the image can be seen clearly.

Use the rubber stamper to pick up the polish and then stamp on nail.  You have to do this relatively fast or else the polish will dry on the stamper and will not stamp.
Hello Kitty nails that my daughter loves.


If you do patterns you will have to remove the polish from your cuticles.  I use a concealer brush and nail polish remove to do this.  That makes it easier so you don't mess up your existing polish on your other hand.


I normally wouldn't paint my nails in Hello Kitty, but it really entertains my daughter when I do.

Monday, November 12, 2012

Does Pam Dry Nails Extra Fast? Let's Put it to the Test

Breastfeeding a newborn means a lot of down time to surf the internet.  I've been on Pinterest a lot lately (and also watching reruns of Teen Mom).  On Pinterest I saw a tip that said putting Pam non stick cooking spray on nails will dry them extra fast.  I googled this, and while other sites talk about it, no one actually tested it with a controlled test.  I decided to test this for myself.  

I painted my nails with one Sally Hansen Base coat and two coats of OPI Party in My Cabana (no top coat).  I waited 30 seconds and then sprayed Pam only on my left hand and let the other hand just dry naturally.  On the internet it says to wipe off the Pam after spraying.  I waited a minute and wiped the Pam.  The results? 

Pam does make your nails dry faster, BUT it only the top coat.  You can still ding your nails as the under layers are not dry.  I actually don't think the Pam is drying your nails, it seems like its just putting a oily coating on the nail polish so if you accidentally brush up against the polish it won't stick to anything (like lint).   If your nails hit a hard object the polish will still ding. 

In conclusion, Pam does work to "dry" your nails, but you can still get dings.   Would I use it again?  Probably, it also leaves my cuticles shiny.    

One other thing, one forum said that Pam makes your nails chip easier.  I did not find this to be the case, as both hands chipped evenly.  

Also remember to spray the Pam over the sink, as it is quite messy.

Does Pam make nails dry faster?  Yes, but its more to protect against accidental brushing up against something, no major dings.

Nails with Pam sprayed on them.  Pretty good cuticle treatment too :)


OPI Party in My Cabana

Pin It button on image hover