
Thursday, September 29, 2011
Tuesday, September 27, 2011
Jewelry/Photo Board
I have always loved these Inspiration Bulletin Boards by Bryn Alexendra made from a simple cork board. I decided to make one and put some inspirations, but also as a place to hang my jewelry.
 |
| Bryn Alexandra's boards. |
 |
| Instead of nail heads I used push pins that are available at any office supply store. |
 |
| Wedding pictures and jewelry. |
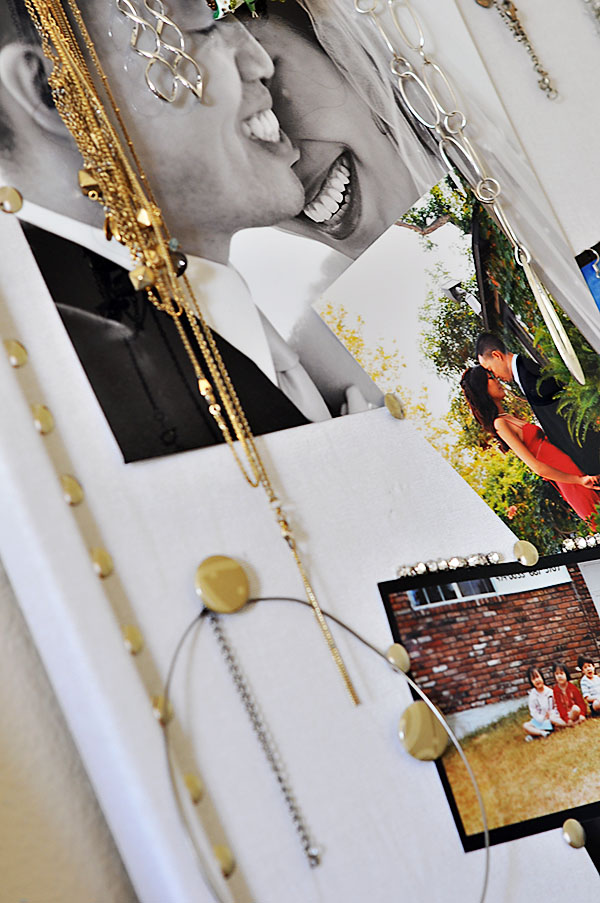 |
| Put some sentimental pictures up also. |
 |
| Jewelry/Photo Board |


Monday, September 26, 2011
What To Do With All Those Digital Photos
If you're like me, you probably have gigs of digital photos sprinkled randomly across directories within harddrives, cds, webpages, and even some still lingering on your camera from 2009. If you're like Jon, then you probably have your images nicely organized on one drive labeled "2011" and sub directories for corresponding dates, ie "2011-05-23 - Chicago Trip". And as each year passes Jon would rename each folder to "2011 Archive" and move it to another drive. Although I use to find this kinda anal, it actually is the best way to organize your images, so you aren't scrambling when you need to say create a wedding slideshow in 2 weeks.
So you may have all this great organization, but now what? If you're like old me, you would print random pictures and never put them into any albums because it just became overwhelming. If you're like Jon, well you never print them and just leave them in the archive.
After Jon and I got married, I decided that I was not going to print anymore pictures, as they just started to stack up, and started creating photobooks. I have experimented with a few companies, (see reviews in previous post for Snapfish, Piccaboo, and Shutterfly). I have done a few posts on Shutterfly because I truly love their quality and service. Since 2009 I have created all my photobooks through Shutterfly and each year their web application interface for creating the photobook gets even better. The last time I used it it allowed me to do custom backgrounds which was great to get that continuous background look. You could achieve this with photoshop, but Shutterfly was way easier.
The photobooks are a great way to document all the things that happen in a year of your life. I usually create one photobook a year and dedicate each page to an event (that's why being organized is key!). I did create a special photobook "baby book" for my daughter and wrote a message inside for her.
Below are images of the photobooks I have made. It looks great displayed on the coffee table, and the books are so well made. It most photobook companies out there are doing a magnificent job. So no more photo albums, that's so old school!
Note: I did not get any compensation from Shutterfly for this post. I simply think that they are an awesome company. But more so I think everyone should use photobooks as a way to archive their family memories.
 |
| Bindings look like real published books. |
 |
| Front covers are customizable. |
 |
| Back cover also customizable with picture. |
 |
| Message to Avery in her baby book |
 |
| Page from Avery's Baby book. |
 |
| More pages from her baby book. |
 |
| Halloween in Avery's baby book. |
 |
| Alaska trip book |
 |
| 2010 Family Album (notice the background that is a customizable image.. yes vegas trip!) |
 |
| This is auto formated by Shutterfly application |
 |
| More 2010 images, background again a custom image. |
 |
| Cover of Alaska photobook. We tried to spell ALASKA with our bodies. |
Sunday, September 25, 2011
Chocolate Covered Gummy Bears Recipe / How To
Chocolate covered gummy bears, 14 dollars a lb at Rocky Mountain Creamery, about 3 dollar a lb to make at home.


 |
| One bag of gummy bears. I usually like Black Forest brand, but Target does not sell them so I opted for Market Pantry (Targets generic brand). |
 |
| Skewer gummy bears with toothpicks. |
 |
| 1/2 cup chocolate in a microwave safe cup. I like using a mug because it keeps in the heat. |
 |
| Place chocolate and butter in microwave and microwave for 40 seconds. Check mixture, by squishing the chocolate with a spatula. Chocolate will not look melted but will squish when pressed. If not melted microwave in 10 second intervals mixing after each 10 seconds. DO NOT OVERHEAT. Over heated chocolate will be clumpy. |
 |
| Mix chocolate and start dipping bears. If mixture gets thick then reheat for 10 seconds at most. |
 |
| Let bears dry on foam board, or anything where the toothpicks can stand. I used a foam board from an old package. |
 |
| Dripping with chocolate. |
 |
| Bear down! |
 |
| Upsidedown. |
 |
| Half Dipped |
 |
| Fully Dipped |
 |
| Skinny dipped. |
Friday, September 23, 2011
Extra Long Coat Rack Tutorial

|
I have been looking for an extra long coat rack forever. With no avail, I decided to make my own 5 foot long coat rack.
The materials and instructions are as follows:
1 7in x 5ft x 1 in piece of wood (I used pine from home depot and had the cut to size. It was less than 6 dollars if I recall.)
5 Cast Iron hooks ( I purchased mine off ebay. They needed some tlc as they had rust on them, so I scrubbed them with Bar Keepers friend and spray painted)
10 One inch wood screws
3 Two inch wood screws to mount coat rack to wall
1 screwdriver
1 drill
For wood I distressed it using a hammer and a chisel. This is not an exact science so just go at it and get out all your stress. For a darker stain I would distress more, as the stain does tend to hide the marks.
After wood is distressed, stain with desired wood finish, do a couple of coats to get desired color and let dry. Cover with a coat of polyurethane. Let dry overnight.
Measure out the hook locations. For my 5 foot wood, I had 5 hooks, the first hook starting at 6 inches, second at 18, third at 30, fourth at 42 and fifth at 54, leaving 6 inches on each side.
Predrill small pilot holes for the hooks if wood is too hard to place screws directly in.
Attach coat hooks onto wood using 1 inch wood screws.
To mount the coat rack I found the studs and screwed the coat rack directly into the wall using the 2 inch wood screws. Since this is a coat rack that will see much use, I highly recommend finding the studs, or at least using the proper anchors to attach to your wall.
The screws I bought were steel color so I took a black sharpie and colored over them. :)
 |
| My empty wall. |
 |
| Cast Iron Hooks from Ebay (20 for 30 dollars, in bad shape but nothing that spraypaint and Bar Keepers Friend couldn't fix). Bar Keepers friend does remove rust BTW. |
 |
| Some of the materials displayed. |
 |
| Measure out the distance between each hook, be sure to evenly distribute hooks at ends. For example, my wood was 5 feet, and I had 5 hooks. Hook one would start at 6 inches, hook 2 at 18 inches etc. That would make it so that the distance at the end of the board to the hook is 6 inches on both sides. |
 |
| Final coat rack. |
 |
| Distressed the wood using a chisel and hammer. |

Thursday, September 22, 2011
Fruit Tart Attempt Numero Dos

Fruit Tart using Smitten Kitchens' Unshrinkable Crust recipe and Ina Garten's Pastry Cream recipe. The pastry cream recipe is easy to make and to die for! You could used store bought pie crust and the pastry cream recipe with some fresh strawberries, so yummy. One alteration I did make on the Pastry Cream recipe is to add a bit more milk or a little less corn startch so the cream isn't as thick. This was my second attempt at a crust and it wasn't half bad. I the tart dough is a little hard to work with because its so crumbly, using alot of saran wrap helped.
Wednesday, September 21, 2011
Painting of Duck and Goose for Nursery
Every now and then I get inspiration to paint. Decided to paint the illustrations inspired by one of Avery’s children’s books for her room. I used 12 x 12 canvases purchased at Michael’s for 15 dollars for 7 canvases. Paints are actually craft paint. Whole project was less than 5 dollars of materials. It was however a few hours worth of relaxing painting. One trick I learned when painting is don’t mix your paints, your colors will be muddy if you are using secondary color paint (ie, paint was mixed with other colors to achieve the color).


Subscribe to:
Posts (Atom)